IoT-TICKET Features
This page contains information about how to use the DAS features in IoT-TICKET.
When starting to use these features, the user should already be somewhat familiar with IoT-TICKET.
Feature 0: Credential management
To start with, there is a feature to define credentials that will be used to authenticate to the calculation endpoints.
This can be e.g. Microsoft Entra ID (former Azure AD) credentials that are scoped for a certain Function App.
The credentials are defined under Organization Management → Credentials: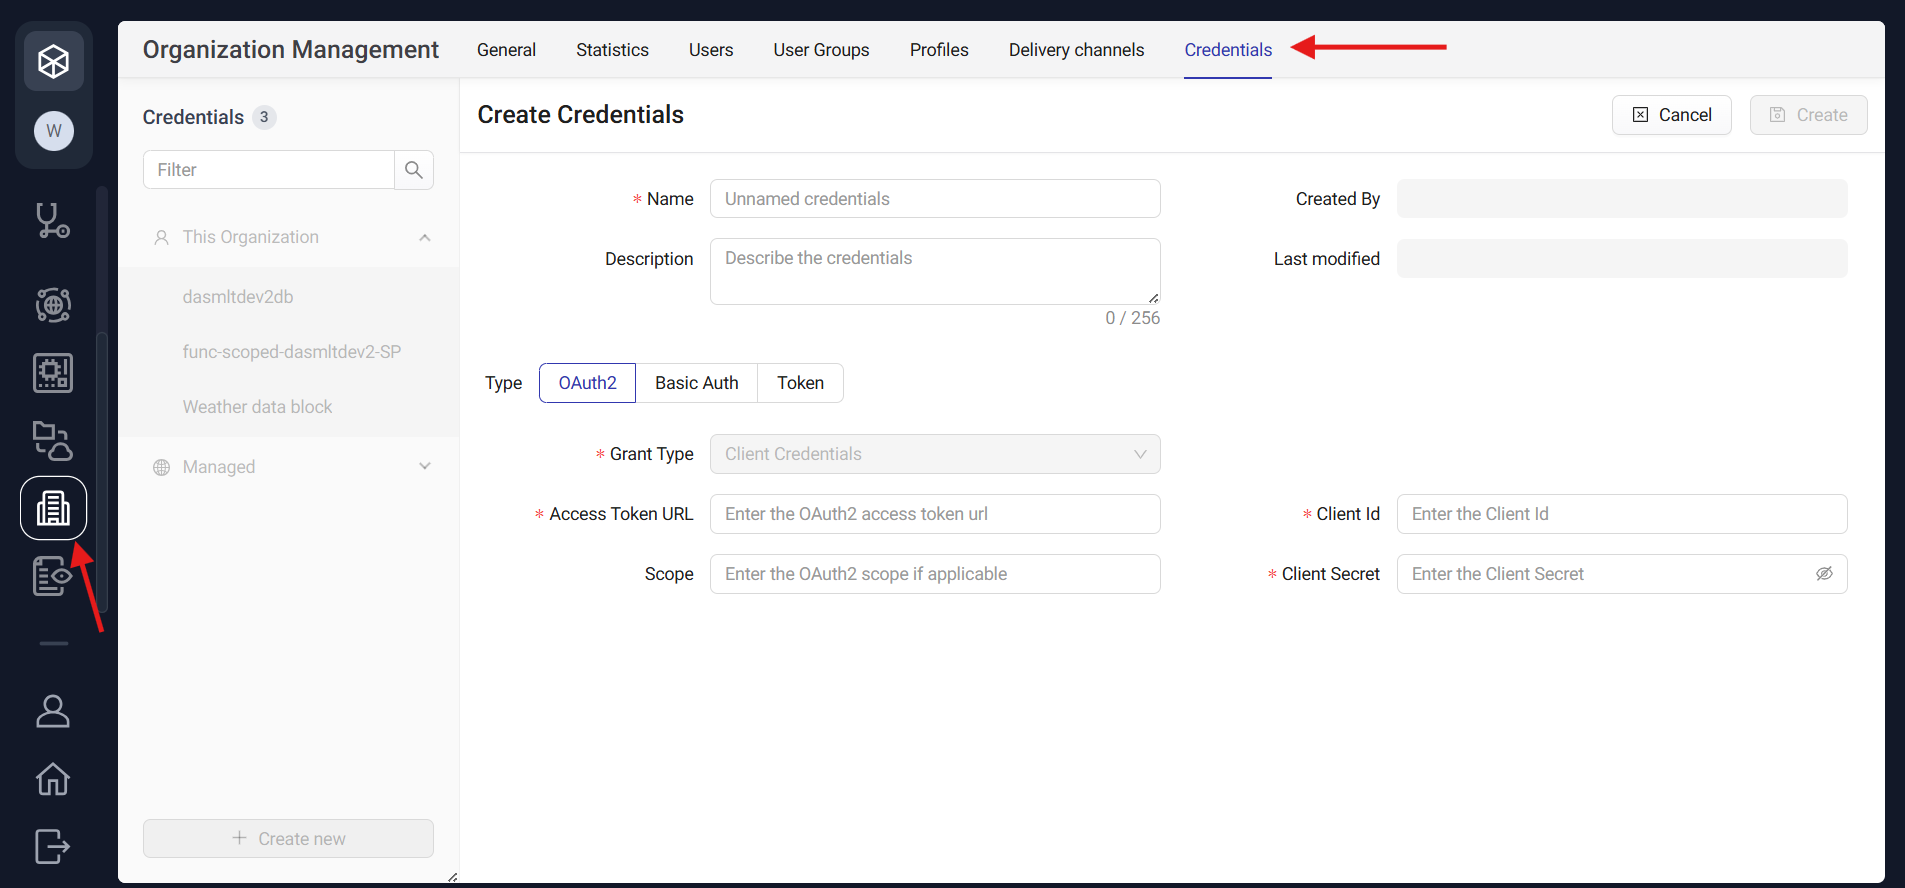
The credentials defined here will then be available to be chosen for an ML Model or an ML Service.
The credentials are defined under Organization Management → Credentials:
The credentials defined here will then be available to be chosen for an ML Model or an ML Service.
Features 1-3: Different ways to run calculations
There are three different ways to run calculations in IoT-TICKET and these are named ML Models, ML Services and ONNX Models.
All of them are defined first in the Data Management → Data Analytics Models tab and the model type is selected there: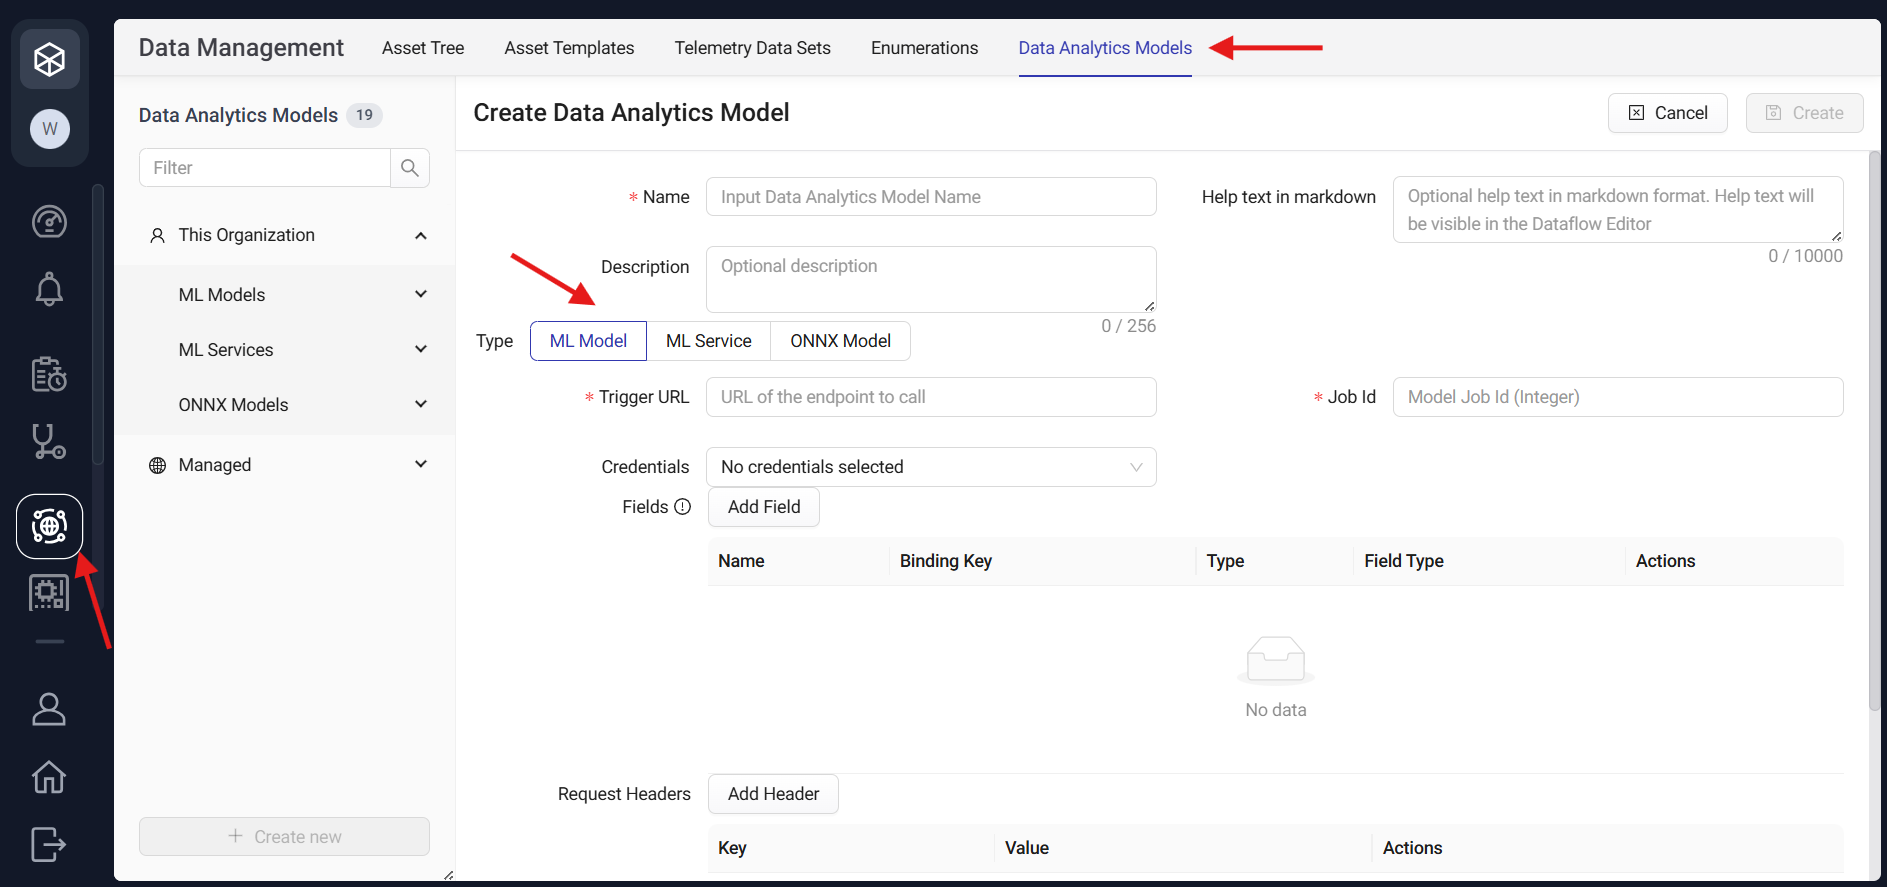
Old models can also be found on the left hand side of this page under the respective sections. Managed models are models which an Owner role user has promoted the access to it for all Organizations under either a subscription or a platform. Managed models can only be modified by Owner role users.
Feature 1: ML Models
ML Models are for asynchronous external computation and they are designed for longer-running calculations, or for example
model training. Here, the data is not sent within the trigger call, but is fetched separately using e.g. the DAS-SDK.
ML Models were originally designed for Databricks jobs, and that is why there is a required Job Id field.
It can be set to be a placeholder for other types of services than Databricks jobs.
Also note that after creating the ML Model, its input and output fields cannot be edited, and the purpose of this is
that changing the input and output fields would break existing Cloud App flows.
Additionally to defining the ML Model's information in the view above, it is defined in for an asset in the Asset Templates view. The input and output fields for the model can be of type Asset Attribute Id, String, Number, or Boolean. Out of these, the String, Number, and Boolean fields are flow inputs/outputs, i.e. single values that are defined in the Cloud App Flow. Meanwhile the Asset Attribute Id type fields are defined when adding the model for an asset template: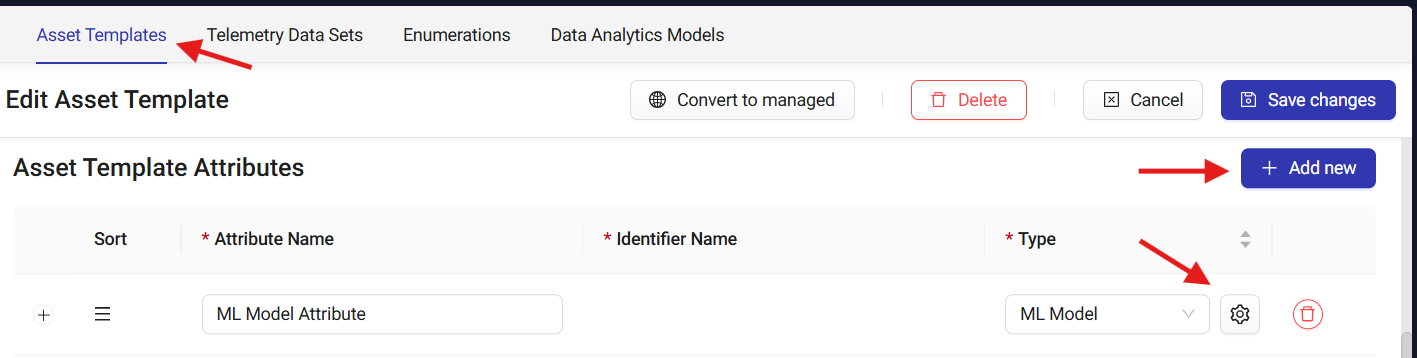
Here, one of the attributes in the Asset Template can be selected, or a Custom mapping can be used to select an attribute from the parent or child assets in the asset tree. The input will be the corresponding asset attribute id, that can be used to fetch the wanted data using the DAS-SDK.
After doing these steps, the ML Model is available in a Cloud App under this asset and can be drag & dropped in the flow: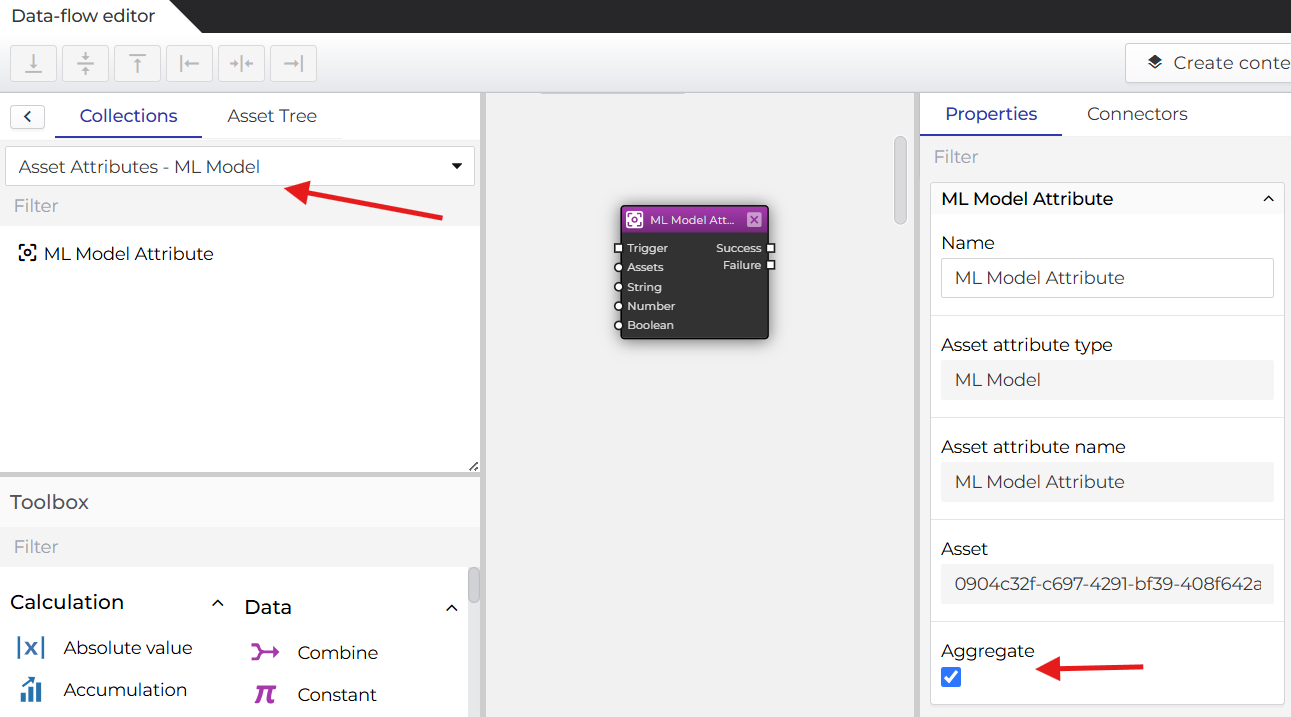
Here it can be seen what it means that String, Number and Boolean fields are flow inputs/outputs. Checking the "Aggregate" checkbox means that running this cloud app will trigger the model for each of the assets that are created based on this template. This means that developers do not need to define the model or add it to a Cloud App more than once.
Feature 2: ML Services
The ML Service feature is there to trigger an external service just like the ML Model feature is.
The difference is that this trigger is synchronous. That means that IoT-TICKET's cloud app flow waits for the response
of the trigger request and that both the input and output data are sent within the requests.
The default timeout can be set when creating the model, and after that time the flow will error.
Also, ML Services do not need to be added to an Asset Template, and are distinct from the asset tree.
Because input and output data are sent within the request from IoT-TICKET, the input and output schemas need to be defined when creating the model in IoT-TICKET. Some examples between corresponding schemas and payloads can be found when hovering over the help icon. These may seem tedious, but a json formatting tool may help. Also, it is good practice to keep some kind of version control for these schemas.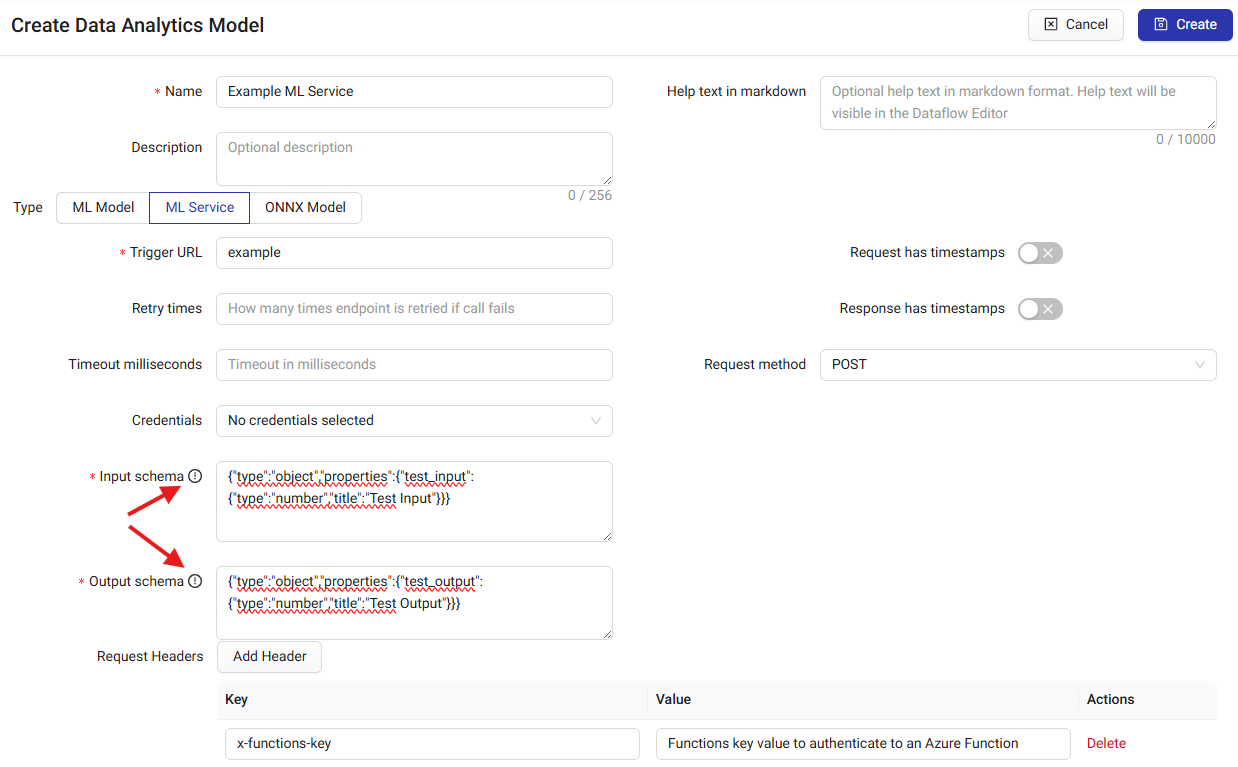
After creating the model in the view above, it is available for selection in a Cloud App's External Calculation block's dropdown menu: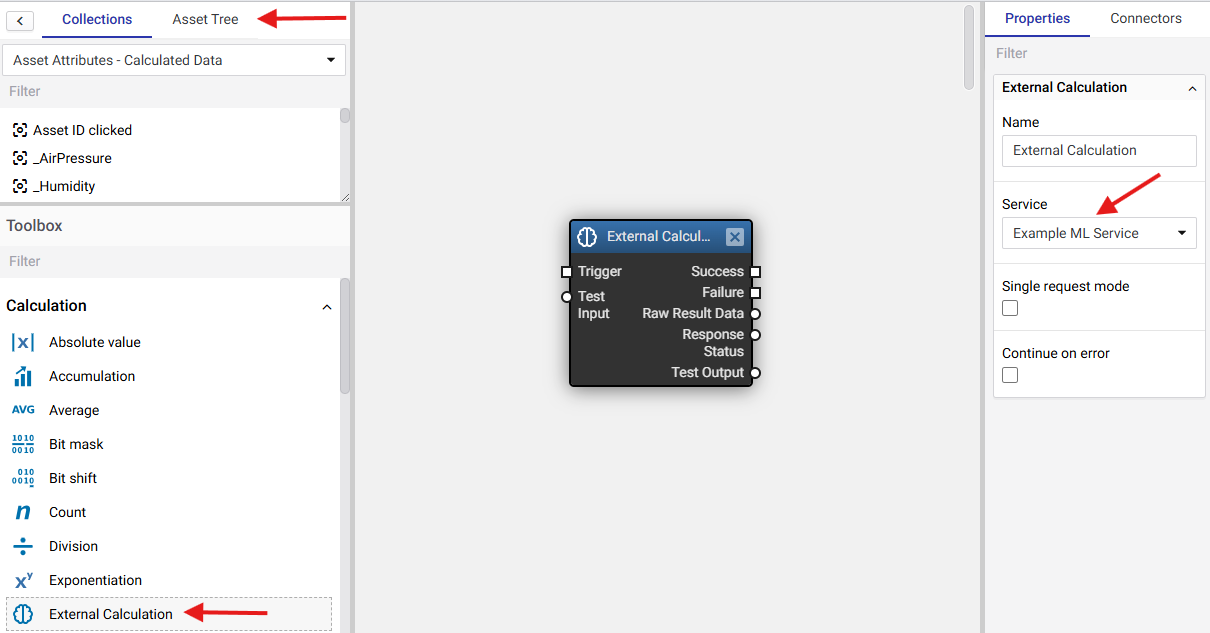
The inputs and outputs here are generated based on the schemas that were defined.
Aggregation can be used with ML Services by selecting the wanted data node from the Collections tab in the upper left corner, and then using the Group by block in Group by asset mode to input the values to the External Calculation block. This will then trigger the ML Service for each similar Asset attribute that existed on the same level or below this Cloud App's level in the asset tree. For example, if there were four asset attributes in the asset tree named "Number", the setup below would send the trigger request four times: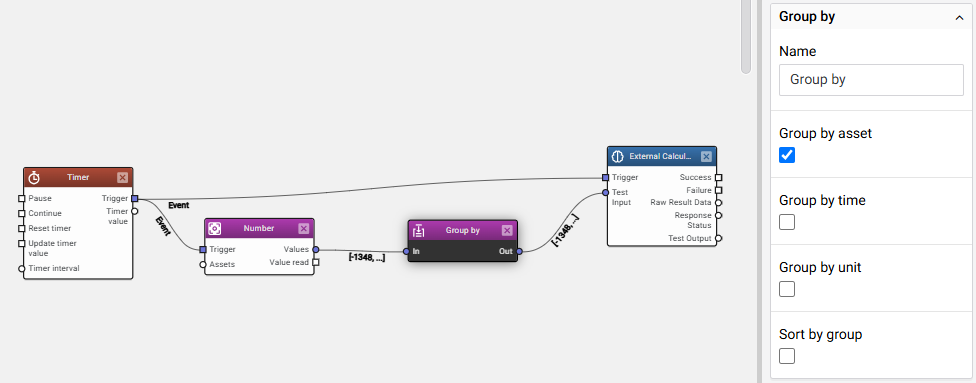
This default behaviour can be changed to aggregate only the data but not the triggers, by selecting the Single request mode under the External Calculation block. In this case, the data from the four "Number" attributes would be sent paired with their corresponding AssetId, but they would be sent in a single request.
The maximum amount of values that IoT-TICKET Cloud Apps can handle is 500k.
Feature 3: ONNX Models
ONNX stands for Open Neural Network Exchange and it is an open standard for machine learning interoperability.
In practice, for example that a model that has been developed with Python, can be converted into an ONNX model and ran
in Java environments. This means that your model can be ran in IoT-TICKET's runtime without any external services.
You can create your own ONNX model from scratch using the underlying operators, or then you can use a ready-made
converter such as onnxmltools, or even select a ready model from the model zoo. More in depth-article on converting
Pytorch models can be found here: Convert custom Pytorch model to ONNX.
Using the ONNX Models in IoT-TICKET is quite straightforward and the creation can be done in the same Data Analytics Models view. Just drag and drop your .onnx file and IoT-TICKET will infer the inputs and outputs based on the model file. This model can then be used in Cloud Apps with the ONNX Model block.
Using the ONNX Models in IoT-TICKET is quite straightforward and the creation can be done in the same Data Analytics Models view. Just drag and drop your .onnx file and IoT-TICKET will infer the inputs and outputs based on the model file. This model can then be used in Cloud Apps with the ONNX Model block.
Summary: Comparison between ML Models, ML Services, and ONNX Models
Here is a table demonstrating the different properties and use cases of each feature:
| ML Models | ML Services | ONNX Models | |
|---|---|---|---|
| Trigger from IoT-TICKET Cloud App flows | ✅ | ✅ | ✅ |
| Available without external cloud services, in IoT-TICKET runtime | ❌ | ❌ | ✅ |
| Is asynchronous → for long-running calculations | ✅ | ❌ | ❌ |
| Is synchronous → results instantly available in the Cloud App flows | ❌ | ✅ | ✅ |
| Data flows to the model with the trigger | ❌ | ✅ | ✅ |
| Ability to fetch data from external sources within the analysis | ✅ | ✅ | ❌ |
| Model definition's instance is defined in the asset tree | ✅ | ❌ | ❌ |
Feature 4: Data Export
When the threshold of 500k values per cloud app is exceeded, the data export feature can be used to deliver data to an external
service to be used in analytics.
First, the delivery channel should be defined, i.e. the target for this data. It is found under the Organization management → Delivery channels view: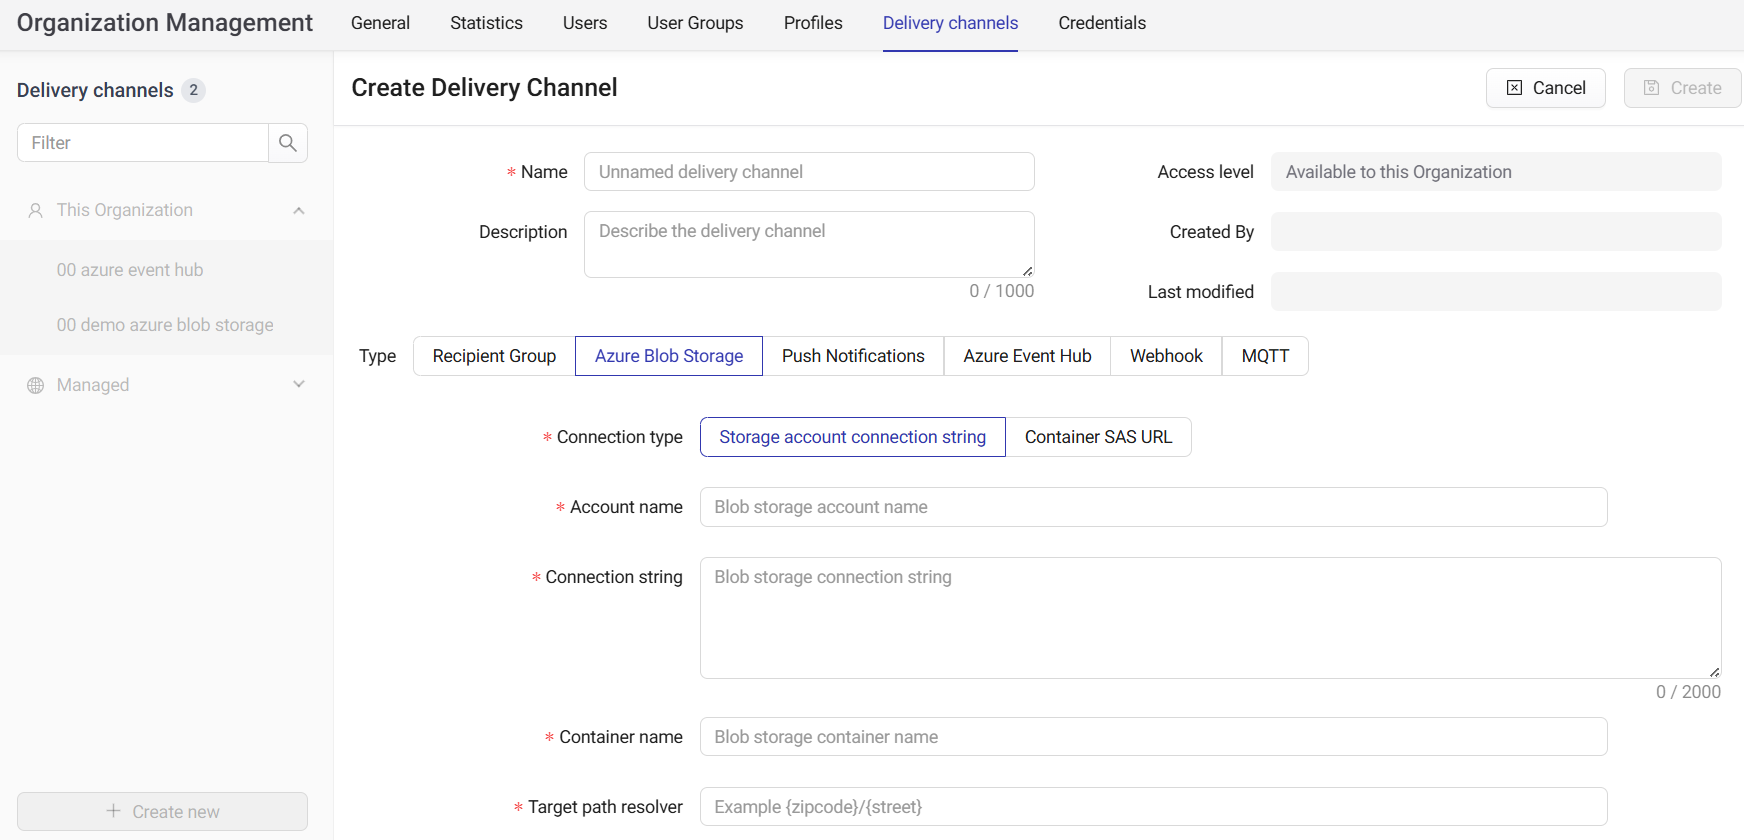
After defining that, the Data Export tool can be found in its own section on the left hand side menu. Creating a new one opens a variety of options: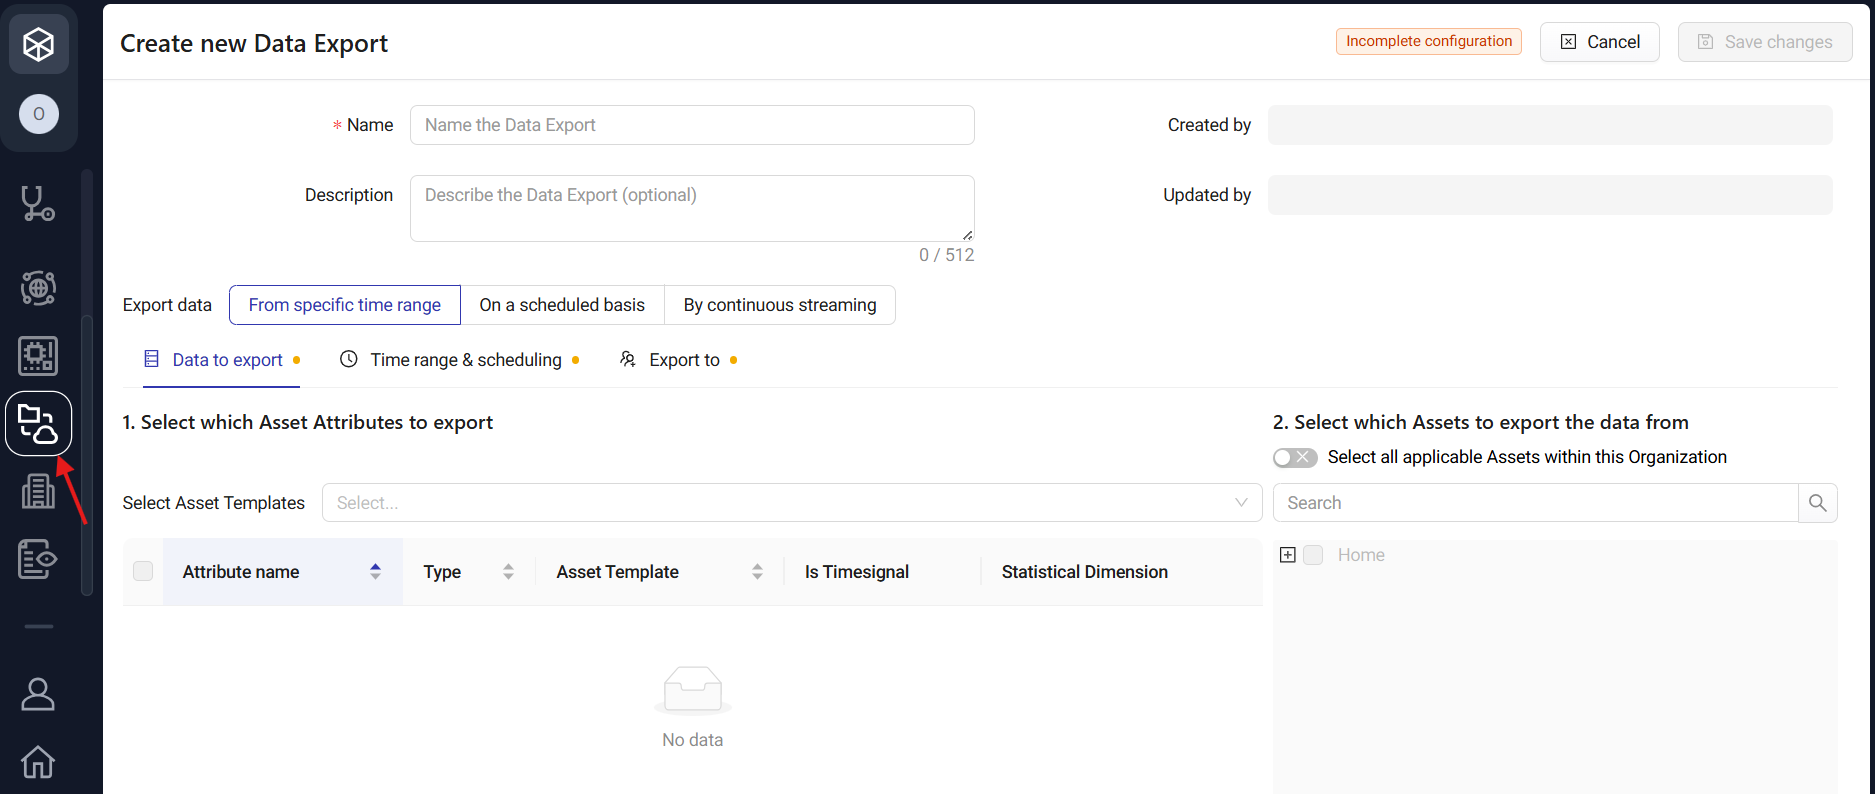
There are two ways to use the data export functionality:
The data selection can be done on a single attribute level, or all data from the selected templates can be exported.
First, the delivery channel should be defined, i.e. the target for this data. It is found under the Organization management → Delivery channels view:
After defining that, the Data Export tool can be found in its own section on the left hand side menu. Creating a new one opens a variety of options:
There are two ways to use the data export functionality:
- Export values from a time range into a file and send those to a delivery channel (manually or automatically with a schedule).
- Setup streaming of asset attribute values into a delivery channel.
The data selection can be done on a single attribute level, or all data from the selected templates can be exported.